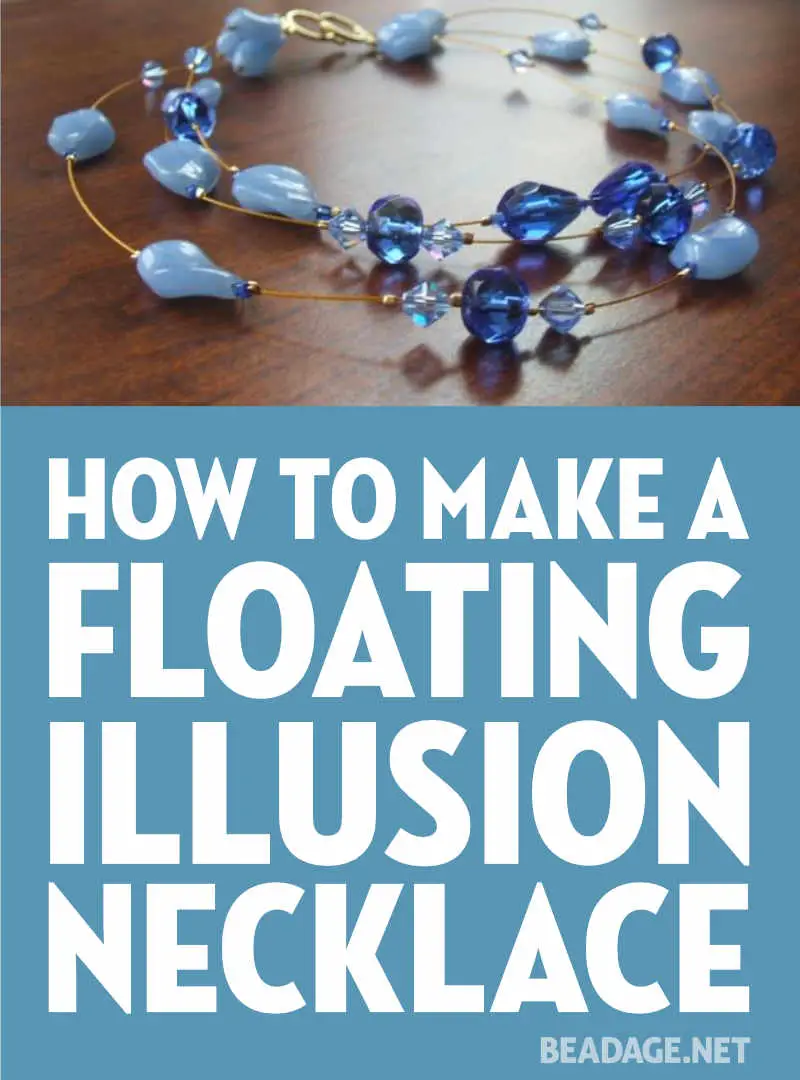
Make this three-strand floating illusion necklace project using beads, a few tools, and crimp beads for spacing. This is a great beginner project for new beaders!
Supplies
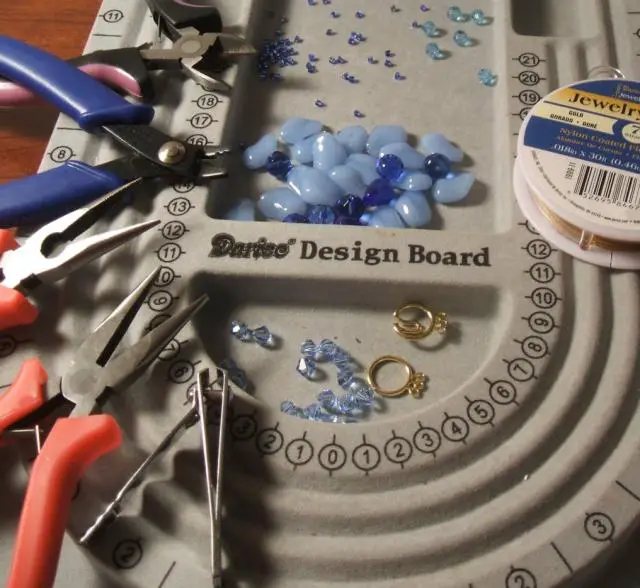
Tools
Materials
- beading wire
- crimp beads
- 3-strand clasp
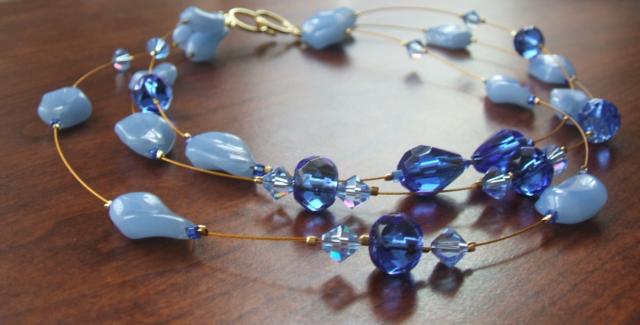
- blue glass beads in both a light and a dark shade, and a few different shapes and sizes
- about 12-20 Swarovski crystals; mix up the sizes and shapes, as long as they are in the same color family
Instructions
 First, figure out how long you want your necklace to be. For floating designs, I like my necklaces to be shorter. Lay out your beads on your design board in the order you’d like to see them in on your necklace. Be sure to space out your light and dark beads, and your crystal and glass beads, to create a pleasing balance. Also vary the sequence from strand to strand. For example, one strand may have more dark blue beads than another strand, while another strand has a few more crystals. This creates the irregular look.
You can either go for strands of varying lengths (usually increasing in length from shortest to longest) or you can go for strands of equal lengths. Sometimes I just figure it out as I go along, and this necklace project seemed to be (oddly!) a mixture of the two options.
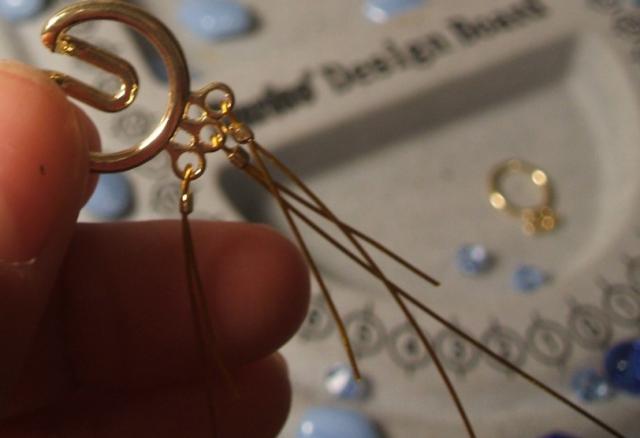 Once you’ve cut your beading wire, thread your three strands through the clasp (you can thread and work on one strand at a time, if it’s easier). Spacing is everything with this design. If it helps, you can measure the distance between each bead. I’ve done that before, and it’s a bit of a headache, so now I usually just measure visually (it’s probably less precise, but it usually still turns out okay).
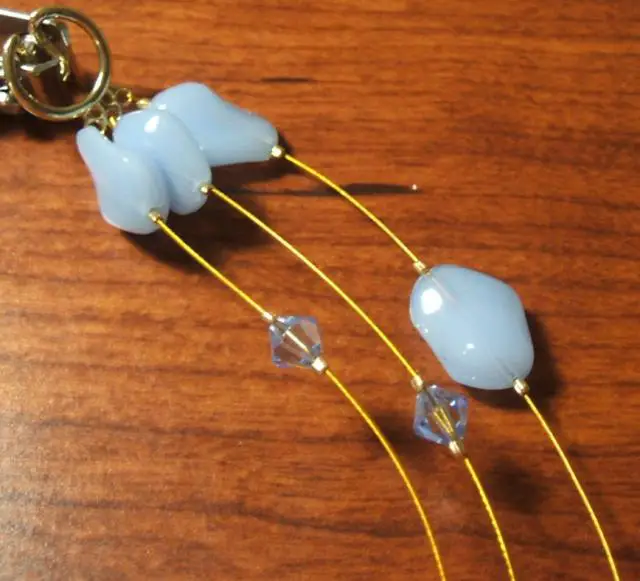 Once you’ve determined the spacing and order of your beads, begin stringing your beads onto the strands. Add a crimp bead, a glass bead or crystal, then another crimp bead, so each bead group is surrounded by crimp beads. Crimp each bead grouping as you go, and then add the next one.
When you’ve reached the end of your strands, thread the ends of your wire through the other half of your clasp, and crimp them snugly, trimming off any extra wire or pushing the wire end through the last bead. You may want to hold off crimping the last bead into place until after you’ve attached the clasp, so you can push it up close to the clasp and cover the wire ends.
It is easy to vary the look of this floating illusion necklace by using different colors, more strands, different spacing, or a different size or style of bead.


")


")


I find that a piece of a plastic straw with a slit in makes a great spacing tool.
that is soo pretty i love beading <3 thank you for putting this on 😀