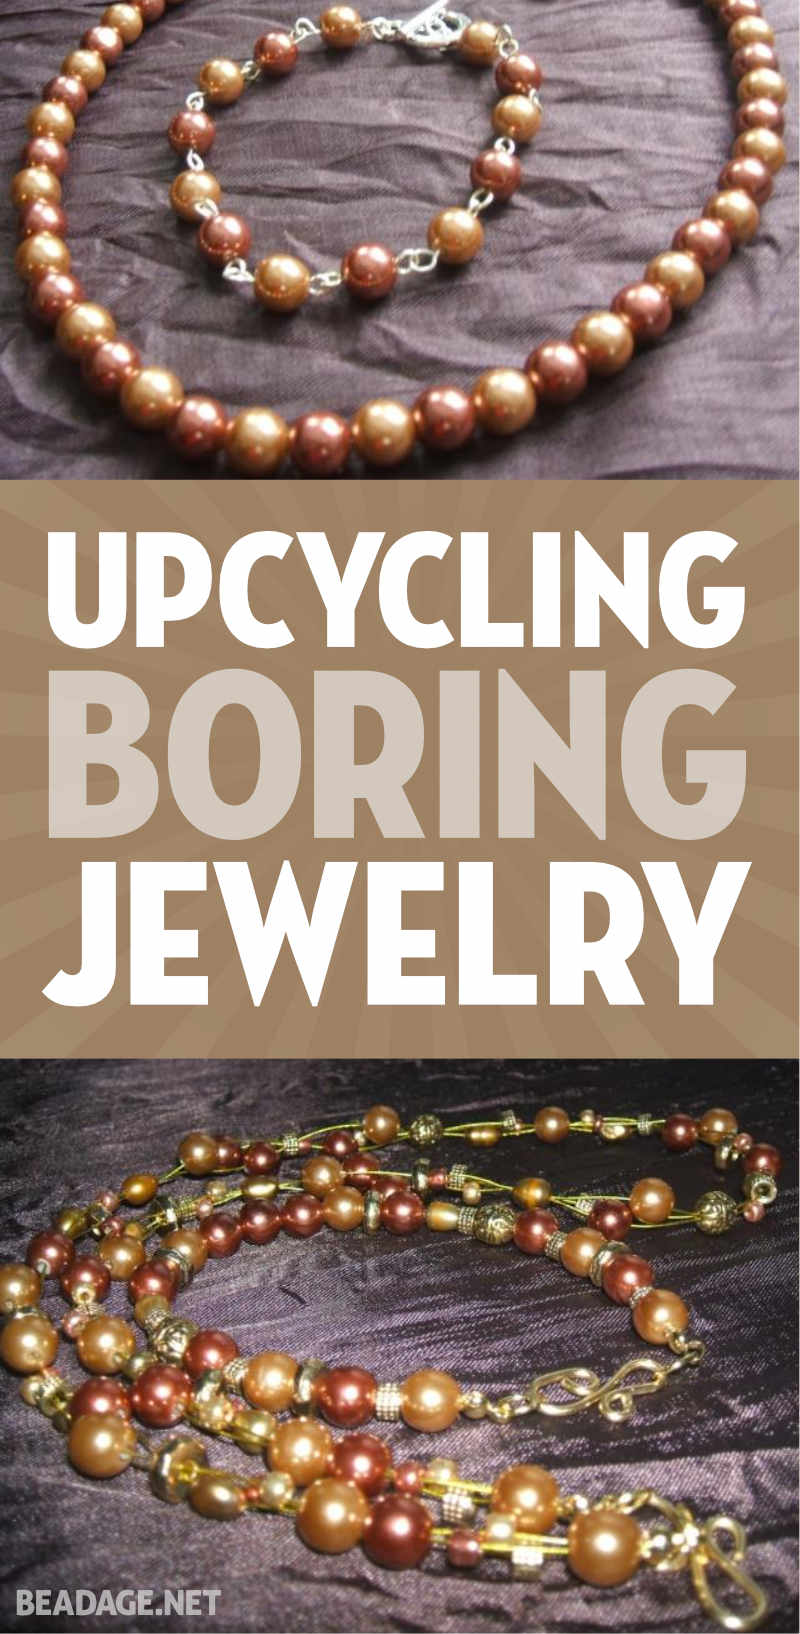
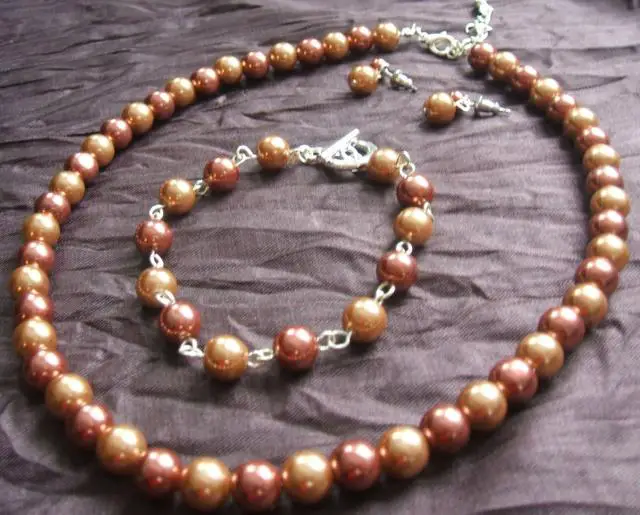
A few years back I bought my mother-in-law a jewelry gift set I thought she might like (pictured below). Wrong! The set was just too plain for her. Now that I make jewelry, she recently gave the set back to me for some sprucing up.
As a beader, you’ll often find that you can create something exactly like, or similar, to something you’ve seen or purchased. I’m certainly no stranger to disassembling a purchased piece of jewelry and using the beads to create something with my own unique flair. I approached my mother-in-law’s jewelry set with this idea in mind.
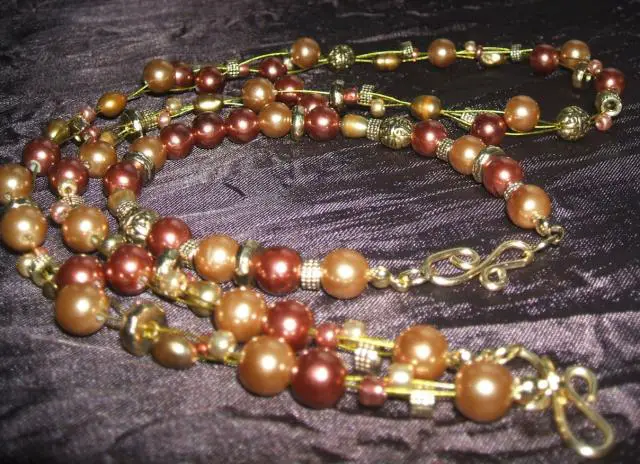
 I took the original set apart by snipping the wire that held the colored beads together. I made a new brass wire ‘S’ clasp, put a jump ring through the bottom of the ‘S’, and attached the jump ring to a crimp cover through which I threaded three strands of gold beading wire. I decided on a multi-strand design for the necklace that would combine the original colored pearls with some coordinating beads of my own.
I arranged the beads and strung them onto the three strands of wire, varying the bead and the grouping. Sometimes I would string two strands of wire through one bead, and other times I would string all three strands through one bead each, and the next time string all three strands of wire through just one bead. It’s good to vary the strand grouping and choice of bead. For this project I used the original pearls, small glass beads the same color as the pearls, small light brown beads and three different metal spacers. With this design you can create a pattern that you stick with throughout the length of the necklace, or you can freestyle it. The freedom of this design is wonderful.
Once I got the necklace to the length I wanted, I strung on a crimp cover, strung on the crimp bead, crimped it, then moved the crimp cover back over the crimp bead and closed the crimp cover. I attached a jump ring to the crimp cover to complete my clasp.
I used a more traditional design for the bracelet, using one strand instead of three. I used the same metal spacers and additional beads I’d used for the necklace, and even included the same brass wire clasp. I used my design board to organize a bead sequence I liked, and then I strung the beads on and finished with the brass ‘S’ clasp.
Consider sprucing up some beaded jewelry you’ve had for a while. Challenge yourself and try a new technique you’ve never used before. You may find that you’ve fallen in love again with some long overlooked pieces of jewelry!


Great job on the remake of these pieces! Did your MIL like them? (or maybe she isn’t getting them back 😉 )
Thanks, Beth! It was fun to do. I hope she’ll like the way they turned out. She was supposed to be in town this weekend, but got sick, so I’ll have to wait to give them to her. If you do any remakes of your own, please let me know how they turned out.
Michele
Thanks for the tips. I just started making jewelry and I am really enjoying all the tips and instructions!