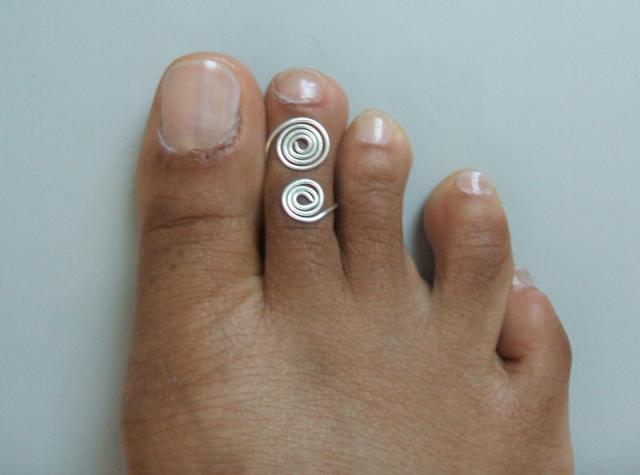
 With summer sandals, toe rings let you show off a little bit of your creativity! Here’s a fun and basic design to get you started.
Supplies
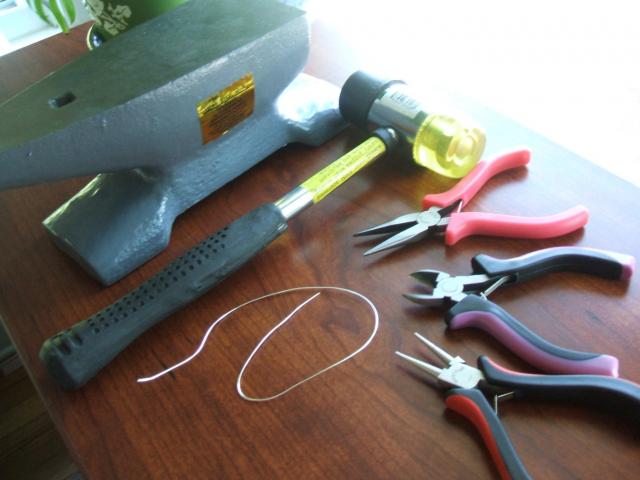
Tools
Materials
- sterling silver wire (about 20 or 21 gauge)
- an anvil (a small one will do just fine)
- mallet or ball peen hammer
Instructions
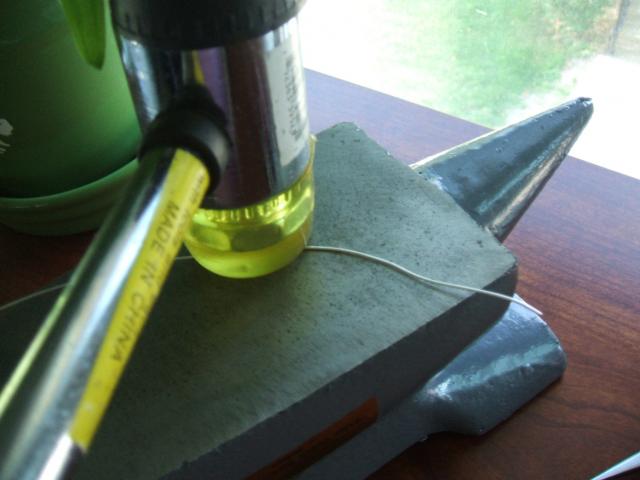 Cut a piece of sterling silver wire about 3.5 to 4 inches long. Put your wire piece on your anvil and, using the rubber end of your mallet, hammer the entire piece. Turn it over and hammer the other side. This makes your sterling wire stronger.
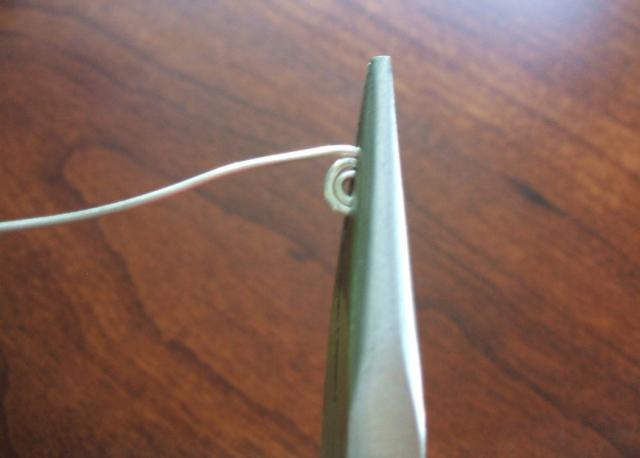
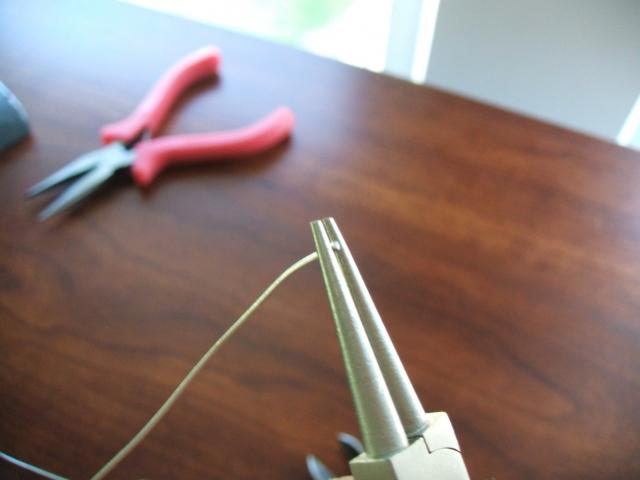 Take your wire and make a loop in it with your round nose pliers. Wrap the wire around your loop a little.
 Using your chain-nose pliers, grasp the small swirled piece and continue wrapping the wire around and around.
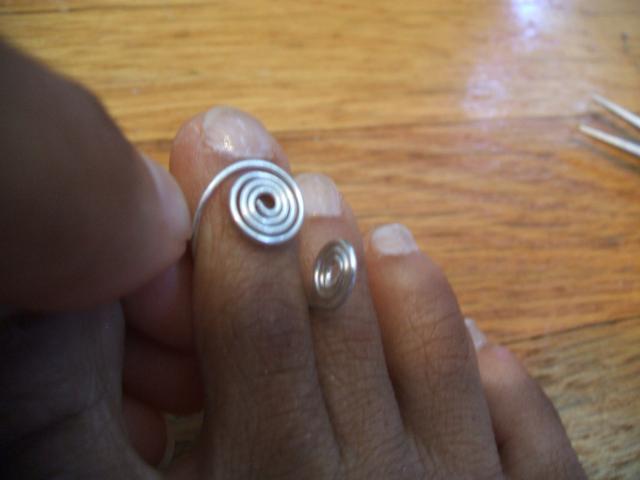
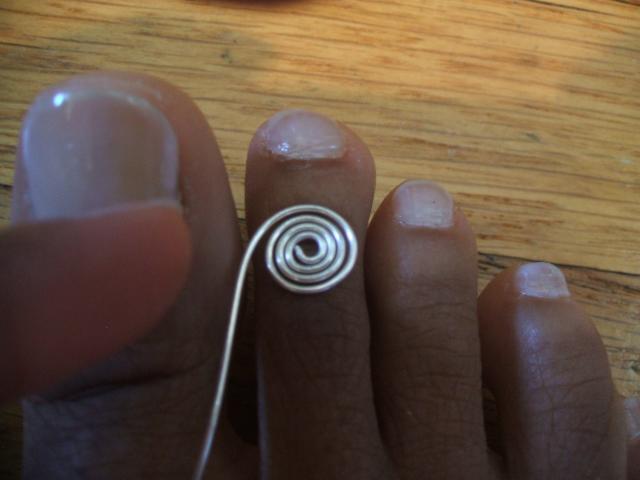 After you’ve wrapped the wire around the loop three or four times, place the wrapped piece on the front of your toe and press it firmly in place.
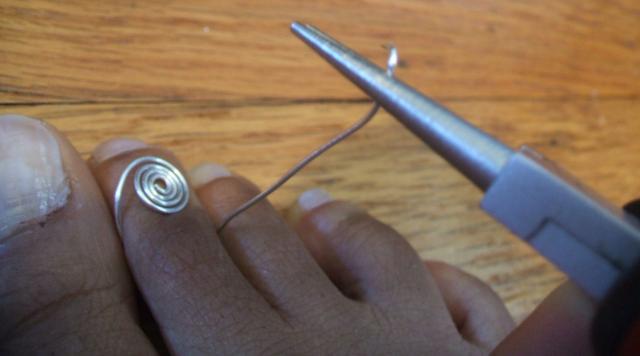 Wrap the tail of the wire around the side and bottom of your toe, bringing it back up the other side.
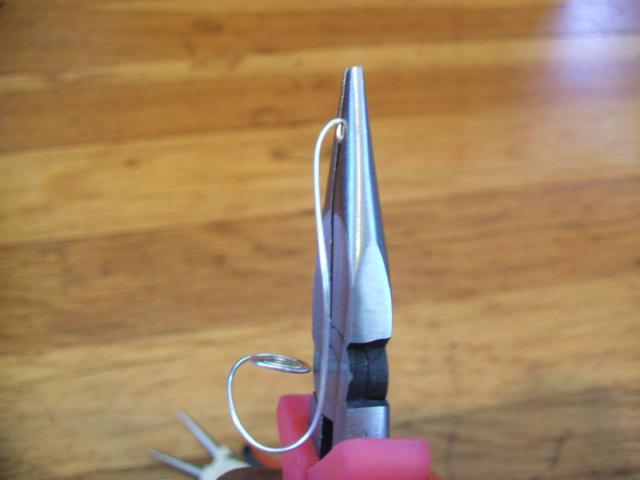 Pull the ring-in-progress gently off your toe, being careful to retain the shape. Make a loop in the tail and, gripping the wire with your chain-nose pliers, wrap the wire down and inward, toward your body.
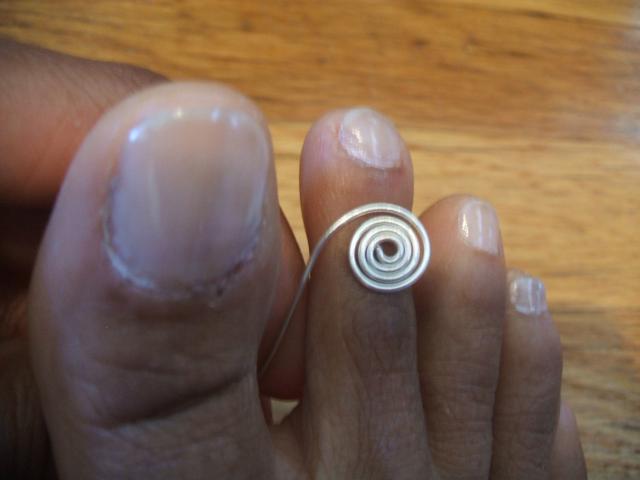
 When you’ve wrapped enough for the toe ring to fit your toe well, slip it back on and press your second swirl firmly in place, just beneath the first one. You’re done — enjoy showing it off!


")

")


 155 Feet 48 meters, Craft Wire, Jewelry wire, Artisan Wire Wrap, WRRI")


, Biggs Picture Jasper Necklace, Jasper Pendant, Pendantlady")


 Pendant In Sterling Silver Wire (#1) - Gorgeous Natural Color And Amazing Spray Pattern!")

I just found your blog…I’m loving your ideas, I think I will be definitely trying out the toe ring. I’m just getting into more wire jewelry projects, this looks like it will be a good intro project.
Cristina,
Good to have you! Yes, this is a fun and easy project…a good intro to wire. I wish you much success!:)
Michele
Does your pliers make marks on the wire? What do you do to prevent it or get the marks out of wire?
Hi Merinda,
In my experience, I end up having some faint markings, no matter what tools I use. The chain-nose pliers (and other pliers with a ‘smooth’ surface) work well enough, but having to ‘grip’ the wire so tightly may leave some faint markings. But usually it’s nothing too unsightly. You may have to experiment with various tools on, say, copper wire. Once you know what you’re working with and when you are more confident, you can move on to sterling. Hopefully by then, you’ll have mastered leaving ‘minimal’ (if any!) marks. Hope this helps.
Happy Beading!
Michele