This ring is fast and easy! It’s an irresistible project you’re sure to love.
Supplies
Tools
- ring mandrel, or other cylindrical object
- wire cutters
The ring mandrel isn’t entirely necessary (you can use your own finger or some other tool), but I found it was helpful in getting the wire formed for a good fit. I picked my mandrel up for just a few bucks.
Materials
I chose a Swarovski crystal that was drilled at the top for added dimension and height. You can choose one drilled through the center, too; that will work just as well.
Instructions
 Cut a length of wire about 12 to 20 inches long, depending on how big your finger is; you can always snip the excess). String your crystal on the wire.
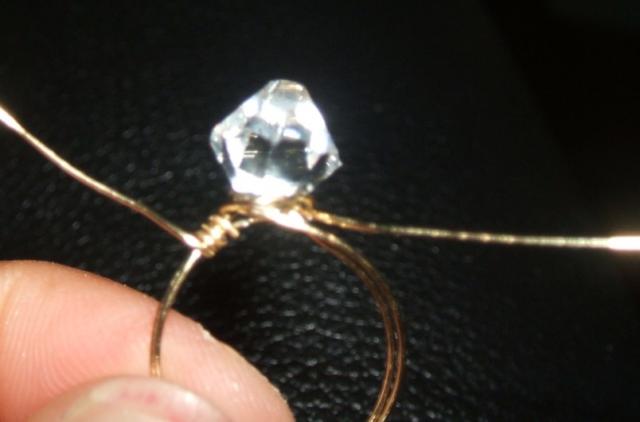
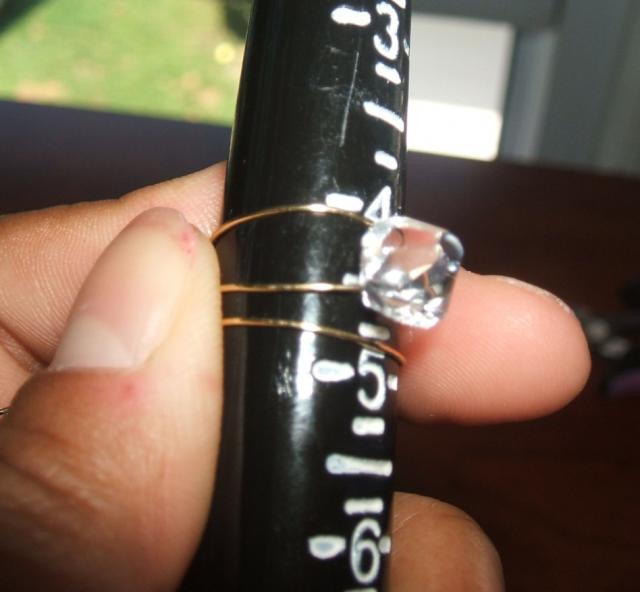 Center your bead on the mandrel. The wire going through your bead should go around toward the bottom of the mandrel. Then wrap the wire around the mandrel above your bead and then again below your bead. Pull the wire snugly.
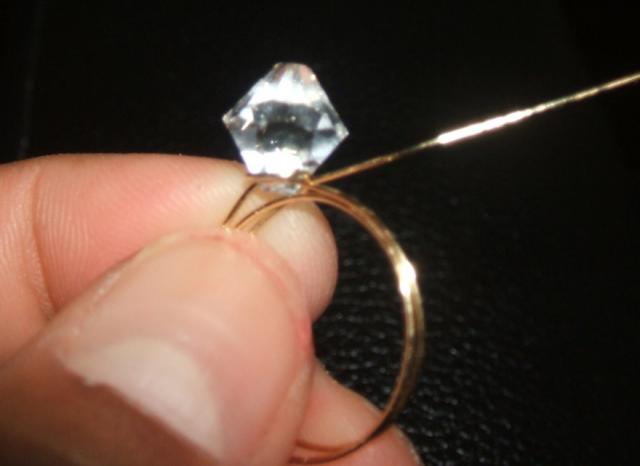 Pull the formed wire off the mandrel and bring one end of the wire around the base of the bead (to secure it), then bring that piece of wire back around until it’s pointing outward.
 Repeat this process with the other end of the wire on the other side of the bead. Now your bead should be well secured.
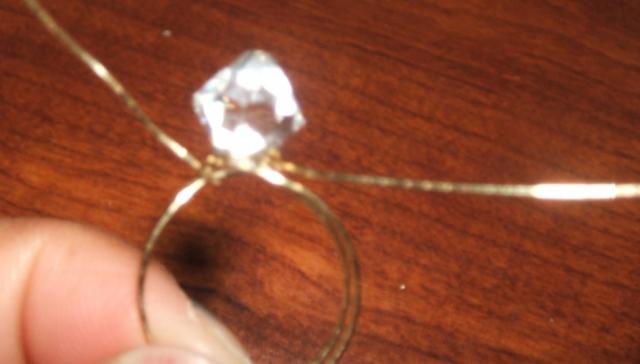
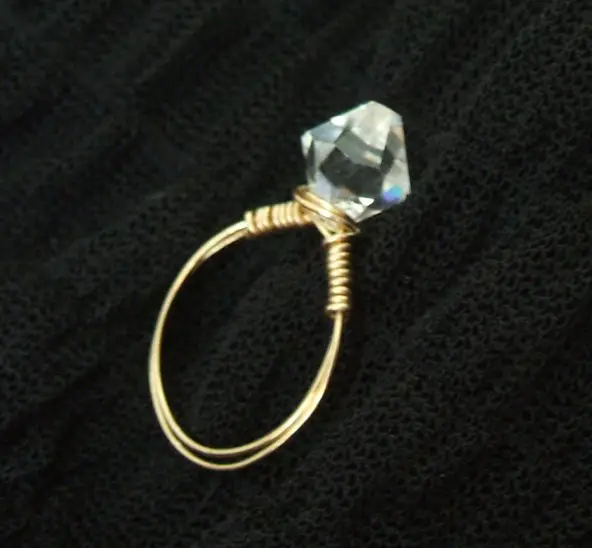
 Begin wrapping the tail of the wire snugly around the area outside the bead. Wrap the wire several times around. Do this first for one side, and then for the other side. When you are done wrapping, snip the wire close to the ring. You’re done!
As a variation, you can use a colorful bead instead of a Swarovski crystal, or you can experiment with different wire-wrapping techniques, like making the ring thicker or coiling the wire inward to make a swirl pattern, instead of just simply snipping the wire. This is a basic design that you can have fun experimenting with. Enjoy!


")


")

")


 155 Feet 48 meters, Craft Wire, Jewelry wire, Artisan Wire Wrap, WRRI")


")
It’s really awesome sometimes to see how a rather simple technique (once learned) can create such a great looking project! Thank you for posting this!
Dan,
You are more than welcome! I already feel like I’m going to be making little rings for my sons’ girlfriends when the time comes in 30 years or so. :). This was actually my first ring, and already I’m thinking of new ideas and additions onto my current wedding set (I know, I’m ambitious!). It’s really a lot of fun, and there’s no end to all the possibilities with ring projects. You’re gonna have a ball!
All the best,
Michele
I love this, it’s so much fun! I’m including it in the Weekend Roundup!
very delicate ring
I tried this so many times
the Swarovski bead breaks after few times wearing.
It’s a nice ring, but only for occasion where you can sit and do nothing.
:-))
Don’t pull the wraps too tight though the stone/glass. I leave mine on the mandrill and make multiple supporting wraps beneath it. Some cheap stones may shatter, but life goes on. I’ve made nearly 100 wire rings and 99% are alive and well. Buttons make really interesting designs.
I hope to get this right!
Was going. over this and I made my with a pink heart shaped stone. It has come out beautifully designed and easy to understand.
Thank you so much for the tutorial i not new to beading but a newbie in wire wrapping so this was a quick and easy project to get started