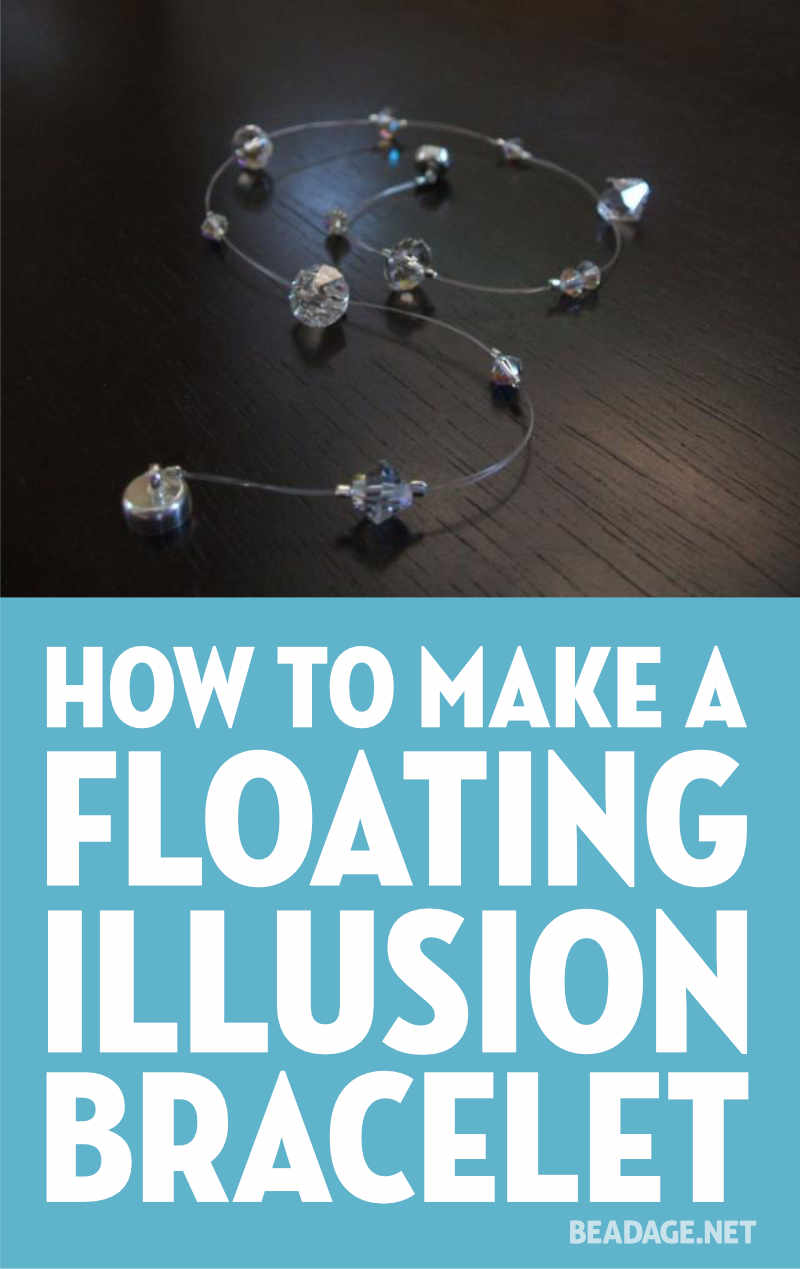
This is a fun way to create sparkle without using color–which means it goes with everything!
Supplies
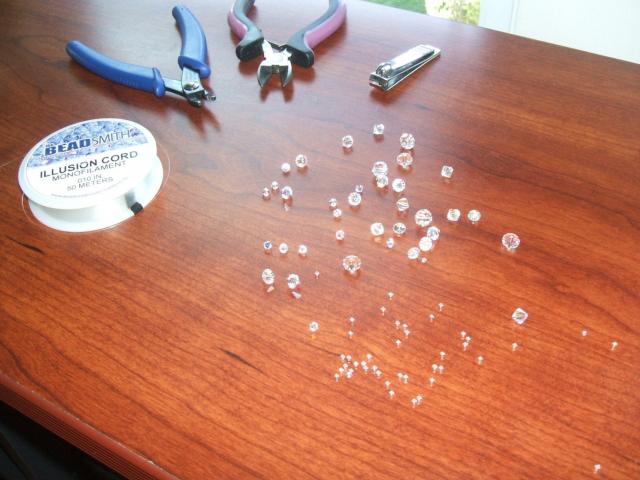
Tools
Materials
- monofilament illusion cord (clear)
- silver-colored crimp beads
- a small handful of crystal and iridescent Swarovski crystals of various shapes and sizes
- a clasp
Instructions
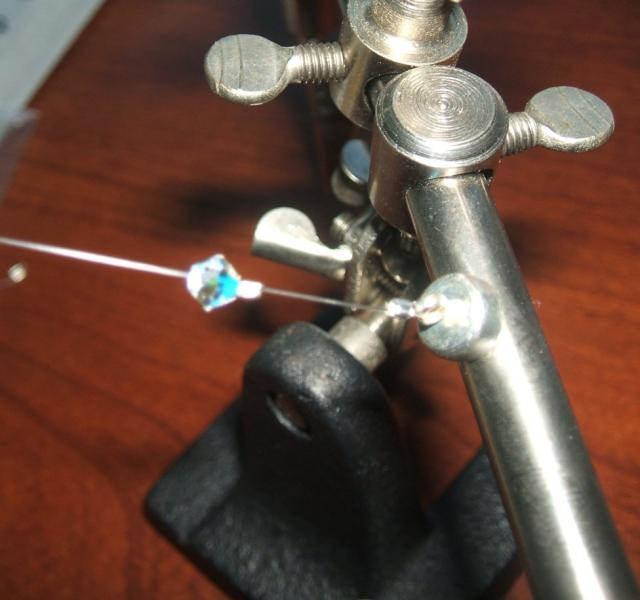 Monofilament illusion cord is light, flexible and it doesn’t get kinks in it like regular beading wire. You can bead with a single strand of it, or double it up for added strength (which I recommend).
Begin by adding one half of your clasp. String a crimp bead onto the cord, then run the cord through your clasp half, and then back through the crimp bead. Crimp the bead into place using your crimping pliers.
(I’ve used a magnetic clasp here–I find it helpful to string outward while the magnetic clasps sticks to something metal.)
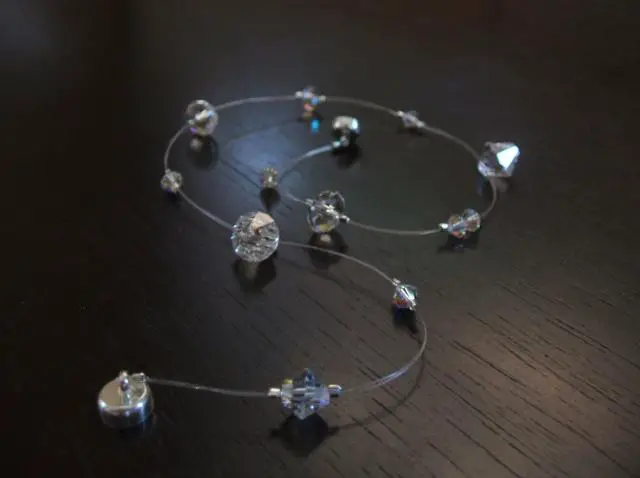
Next, begin adding your crystals. Start with a smaller one, closer to your clasp. Add a crimp bead, crimping it down into place, a crystal, then another crimp bead to secure the crystal. This part is just like a typical ‘floating’ necklace.
 Continue adding crystals and crimp beads, alternating between the plain crystal (I’ve used faceted plain crystal here) and the iridescent ones. Space your beads close together, with enough distance for clear separation of the beads. Try to alternate between smaller crystals and larger ones for more dramatic effect.
 Continue adding crystals to your cord and periodically check the length. The bracelet should wrap around your wrist twice. I measured my bracelet around my neck, and when the bracelet grew long enough to be a necklace that was tight around the circumference of my neck, I added the other half of my clasp and ended the bracelet.
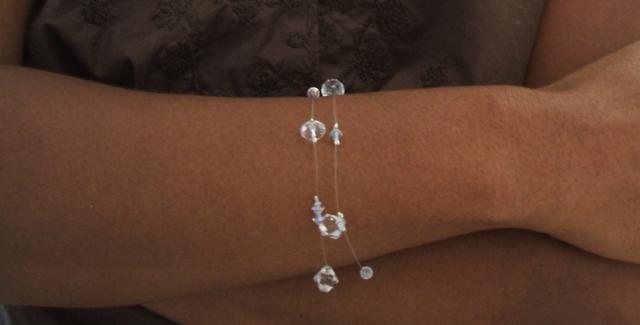
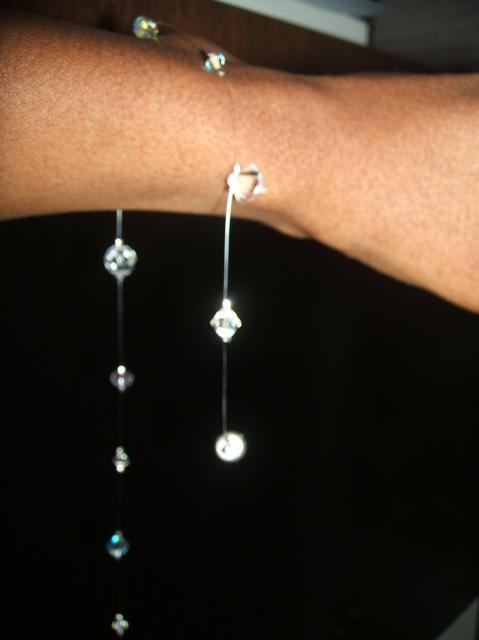 Placing it on your wrist, one end will be shorter than the other. Wrap the excess bracelet around your wrist again and fasten your clasp.
 This bracelet is so lightweight, you’ll forget you’re wearing it, and it catches the sunlight beautifully. If you love your bracelet as much as I love mine, why not try making a matching necklace? Enjoy!

 | Bead Design Board, Schmuckbrett, Armbandbrett")


")


")


 Pendant In Sterling Silver Wire (#1) - Gorgeous Natural Color And Amazing Spray Pattern!")


What a great idea, I love this style in a necklace but never thought of using it for a bracelet or even earrings.
it is a great idea. I will add color as well wich stands out nicely