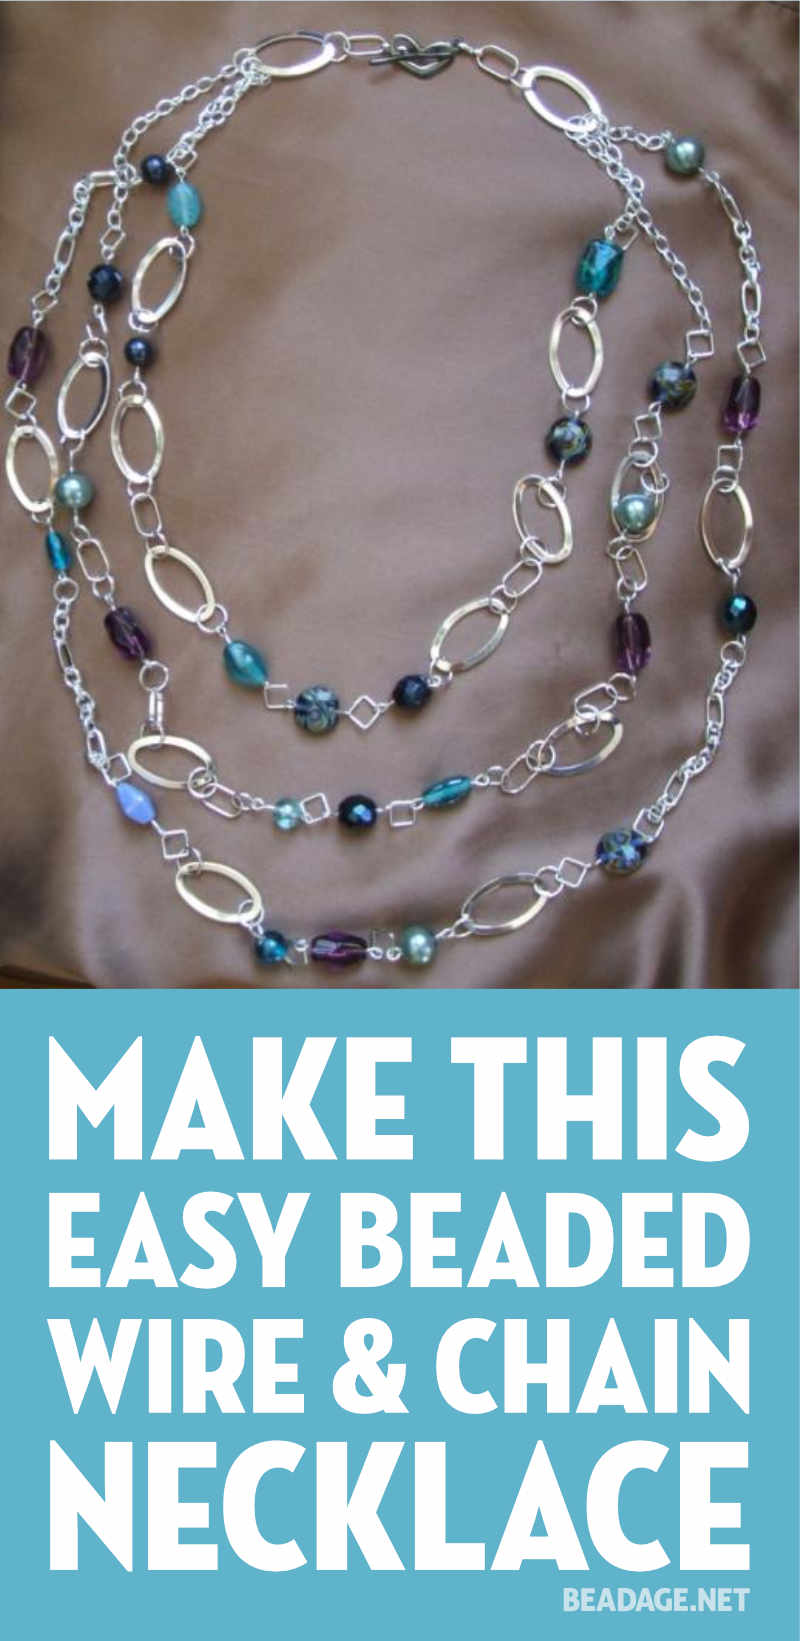
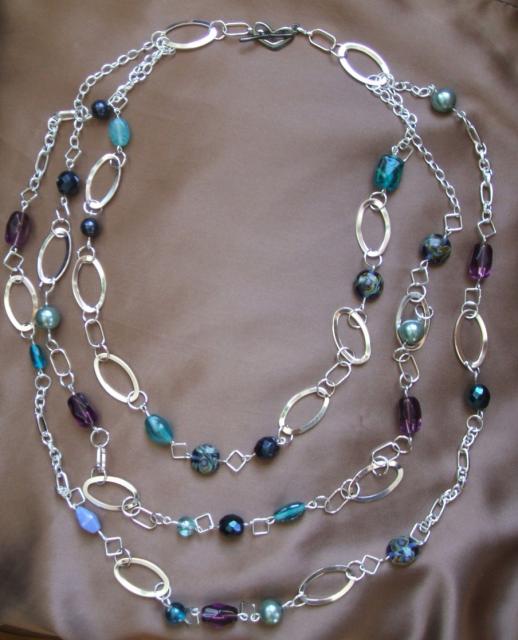
This stylish and colorful three-chain layered necklace delivers three times the wow, and with a little patience and good bead selection, you’ll be proud to say you made this piece!
Supplies
Tools
- chain nose pliers
- round nose pliers
- wire cutters
- bead design tray
Materials
- 20-gauge wire
- round and square jump rings
- three different types of chain. Be sure that one of the chain types has large oval links
- a colorful array of beads – I’ve chosen purples, aqua, deep blues and multi-colored glass beads
- a clasp in the same metal color as your chain
Techniques
Review How to Make Wire Jewelry for how to make a double eye-pin.
Instructions
Arrange the beads on your design board, varying the spacing as you go along. Once you’ve got your beads where you want them, use 20-gauge wire and put a double eye pin in each bead, placing the bead back in its place after you’ve completed your double eye pin. Next, figure out how long you’ll want your necklace to be. Remember this is a three-chain design, and the lengths will be staggered so that the second chain will be longer than the first, and the third chain will be longer than the second.
Begin to cut pieces of the three types of chain you’ve chosen, and decide where you want each length of chain to go. Mix it up and use all three (or at least two) of the different chain types on each chain layer. Place your pieces of chain between the beads on your design board. As you near the end of your necklace, be sure to place the large, oval links near the clasp as a joining link that will hold the ends of the chain on both sides of the necklace.
Once this is done, you’re ready to connect the beads to the chain. Here, I’ve used both round and square jump rings to add variety. Open your jump rings and connect them with the beaded double eye pins and the chain. Check as you are doing this, and make any necessary changes, like the removal or addition of links and/or beads.
As you near the end of the necklace, put three jump rings through the final links of the three lengths of beaded chain and connect those jump rings to the large oval link at the end of both sides of the necklace. You can add additional jump rings or other metal pieces, if you’d like, so long as you use one of those for your clasp to connect to. Here, I’ve used a dark colored heart toggle clasp to add color and interest to my finish. The result is a classy and colorful beaded chain I feel pretty good about. This isn’t the quickest project, but it’s well worth the extra effort!


")

")


 155 Feet 48 meters, Craft Wire, Jewelry wire, Artisan Wire Wrap, WRRI")


That’s a really beautiful piece of jewelry. Thanks for sharing the instructions.
~Johanna~
Johanna,
You are more than welcome. Thanks for the visit.
Happy Beading,
Michele
Hi Michele, I have a question for you. I have just started beading, and what I want to doing is making a necklace that is not closed in the front. I ended it with wrapped beads so I would have a way to link a bracelet to it. This way I have two pieces or 1 long necklace. My question is what is the best way to connect the two. Is there a closure that won’t look like a closure. It will be the focal point without the bracelet attached.
I look forward to learning all I can from your blog. Renee
Michele,
Your designs are simple, easy to follow and give inspiration. Thanks for sharing!
Renee,
I don’t know if your question was answered, but I used toggle clasps to make the necklace/bracelet combo that you described. There are some cool clasps out there that can really add to the necklace design. I tend to use a lot of natural stone in my jewelery, so the weight of the piece keeps the clasps securely connected when I choose to wear the necklace long.
Happy Beading!
M.B.