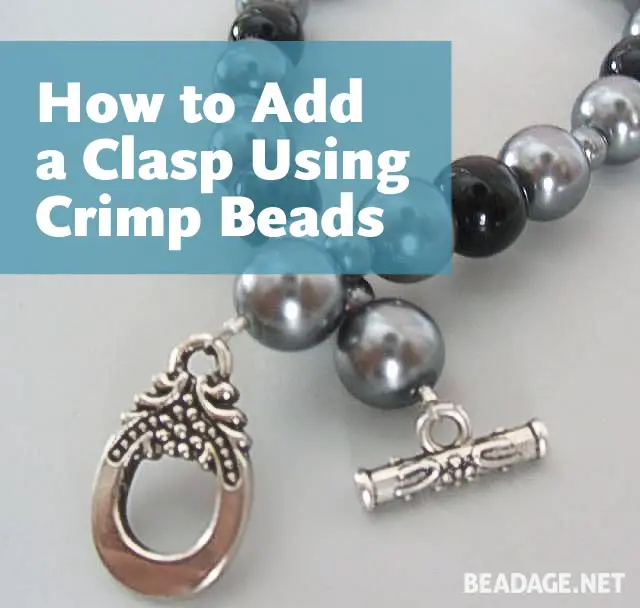
You can use crimp covers (callottes) to add clasps to jewelry made with beading wire, or you can use the technique below for a more polished look.
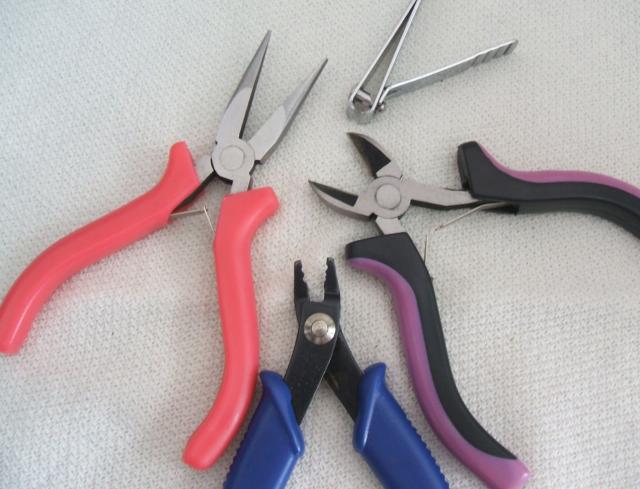 Gather Your Tools You will need a few tools when finishing your piece — chain nose pliers, a nail clipper, crimping pliers and occasionally wire cutters (I’m able to snip beading wire really close with nail clippers, though). Always use crimping pliers for a great result. The crimping pliers have a couple of different dips and grooves so that your crimp bead looks nicely folded and rounded. Use the groove closest to your body to smash the crimp bead in one direction. Using the groove furthest away from you folds the crimp over for a crisp look.
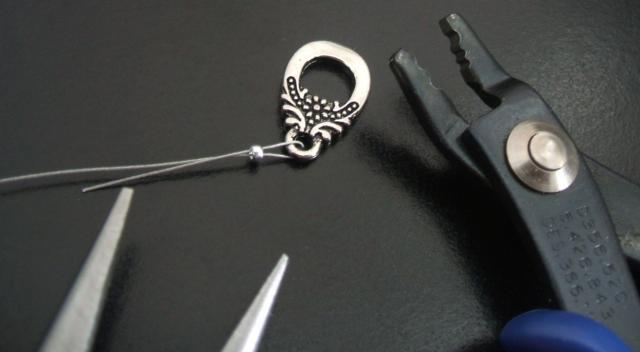 Start With Your Clasp When adding a clasp, thread your crimp bead onto your wire, and then bring the wire through the eye of one end of your clasp. Now bring the wire back down through the crimp bead and use your chain nose pliers to PULL — as tightly as you can to get the crimp bead snug against the clasp. In some instances, though, you may need to allow for a little slack, as some pieces won’t hang correctly if the beads are pulled too taut. So be careful to judge correctly what your piece needs.
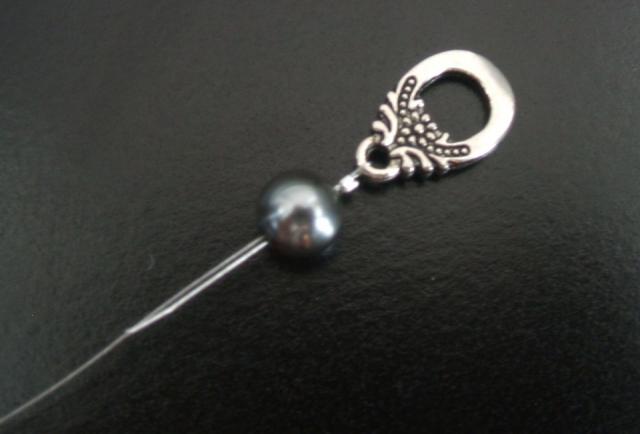 Add Your Beads When you are ready to string on your beads, be sure to string the excess wire (or ‘tail’) into the first two or three beads. With the tail safely hidden inside these beads, you won’t be able to see where the tail ends, so your crimp and clasp end look smooth and flawless.
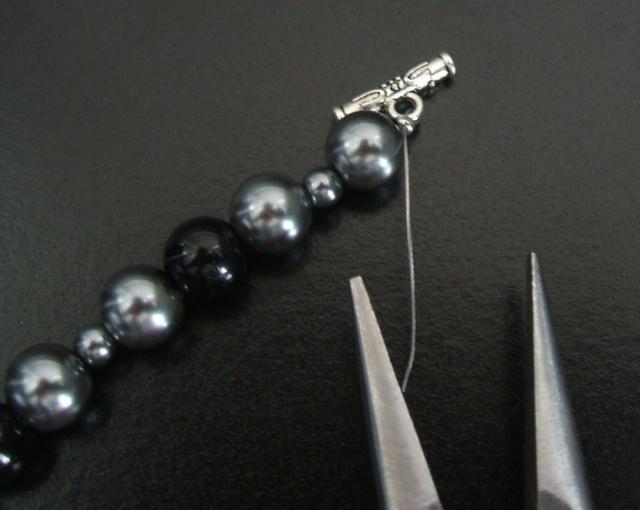 Finish Your Piece Once you’ve strung your beads on and are ready to finish your piece, repeat the process with the clasp and crimp bead that you did on the first end of your piece. You’ll have to use your chain nose pliers to thread the tail through two or three beads. This can be pretty tricky, so you’ll have to work with it for a bit.
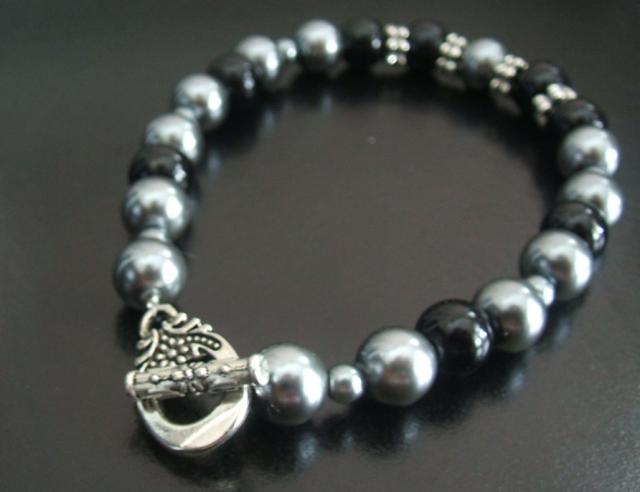
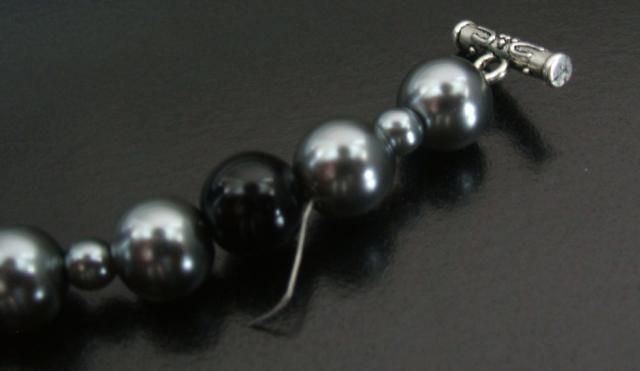 Hide the Tail When you see the tail peeking out after the third bead or so, pull it tightly so the tail comes down as far as it can. Now you can snip it close to the bead with the nail clippers. Smooth out your beads so that no wire shows through and you’re finished! Certainly smooth and finished pieces, particularly where adding clasps are concerned, can take a little time. But keep at it. The more times you try it, the better you’ll become.


")


Thanks so much for the lesson on professional ‘endings’! You really did a wonderful job with the lesson, and I am excited to use your techniques in my next project. Really, thanks again for answering my question with such detail! I also loved the following lesson with the wire wrap.
Michelle
Michelle,
We really care about your beading experience! Glad the tips were so helpful to you. I hope they’ll produce results you’ll be proud of.
Happy Beading! 🙂
Michele
Thank you so much for the tip. I just started beading and this tip is great!
Great, Lisa! I’m glad this was helpful.
Happy Beading,
Michele
Thank you for taking the time and detail it really was so helpful that you shared your work and talent with us! Wow! What a blessing!
Kim,
You are more than welcome! Glad you are here!
Happy Beading,
Michele
Hi there. I have recently started making jewellery. I am using threading wire/Nylon stuff (like fishing wire) so far I am just knotting the ends. I want to add something over the knot to make it look better finished & a bit more secure. I have seen crimp caps/covers on ebay and wondered if they would do the job?
I am proud of my first pair of earrings I made they turned out better then expected so I am looking forward to making more stuff soon. I am mostly using semi-precious gem stones like Turquoise, Amber, Coral, Garnet etc.
Thank you for a great tutorial by the way…
Aby
(CrystalGecko)
Hi Aby,
Welcome to the world of jewelry making! You’re gonna love it (as I’m sure you know already). I think crimp covers will do the job to make your nylon wire look more attractive, though I am not 100% sure. I’d suggest testing your knot with a crimp cover before starting a serious project.
I’m glad you’re off to a good start in jewelry making…I’m sure you have lots of successes that await you!:)
Happy Beading,
Michele
This was the first place i got the information I needed on attaching clasps. Simple and easy to follow steps. I have just started the hobby. Thanks for a great tip.
what about silk thread?any good ideas to make it look really professionally done?I don’t like the look of the clam shell bead tip or the little cups.you don’t really see those used in fine jewelry but I can’t figure out how they do it.any ideas? hey~thanks! dEb
Hi Deborah,
Like you, I like the option of not using clam shells…I used them much more as a newbie beader, but prefer not using them. As for silk thread, I’m not sure, as I’ve not used it before; all I can recommend is to pull your thread as tight as you can so there is no ‘slack’ showing. This will require some precision and maybe some trial and error too. Also, if you are using jump rings (which I like better than split rings), it might be a good idea to solder your jump ring so that your silk thread stays put and won’t find its way out through the jump ring. I wish you a lot of success with this! Sorry I can’t be of more help. Thanks for stopping by.:)
Happy beading,
Michele
I love this site and its so simple to understand the info. Thanks for the info.
I would appreciate any updates
Thanx
Michele, thank you for such a good article. Clasps are a challenge for me but I keep on trying! The one problem I do have, is my clasps on finished pieces slide towards the front and my focal piece then ends up being off-centered and the clasps ends up showing from the front view.
How can I stop my clasp from sliding towards the front when the piece is worn?
Thanks much for any advice!